What’s Hiding in That Drain Pan — And What to Do When You Find It

Some of the most important finds on a service call are the ones the homeowner never would have noticed.

Visible algae growth. A slow drain that’s one hot week away from backing up into the ceiling. You’ve seen it before. The homeowner has no idea it’s there.

That moment — when you find something the customer didn’t know to worry about — is where a good technician earns long-term trust. Not by upselling, but by doing the job completely. Finding the problem, explaining it clearly, fixing it on the spot, and making sure it doesn’t come back.

Here’s a practical framework for handling drain line issues when you encounter them in the field — the right tools for the situation, and what to put in place before you leave so the next tech (or the next season) doesn’t find the same mess.

What You’re Actually Looking At

Condensate drain lines operate in conditions that are ideal for biological growth — warm, dark, consistently moist. Over a full cooling season, algae, mold, biofilm, and dust accumulate inside the line and around the trap. In humid climates, that process happens faster than most homeowners realize.

What you find on a service call can range to a fully restricted line or standing water in the pan. Either way, the path forward is the same: clear what’s there, protect what’s next.

The difference between a technician who spots this and addresses it completely — versus one who notes it and moves on — is the difference between a callback in October and a customer who renews their maintenance agreement.

Step One: Clear the Line

Before you can protect anything, you need a clean starting point. Depending on what you find, here are the right tools for the job:

TRADEPRO® CO2 Drain Gun (TP-DRNTL3834) with CO2 Cartridges (TP-CO2CART16G) For lines with moderate buildup or partial restrictions, a CO2 flush is fast and effective. The pressurized burst breaks up biofilm and clears debris without making a mess. Cartridge refills mean you’re not limited to one shot per call — useful when you’re working through heavier buildup or clearing a longer line run.

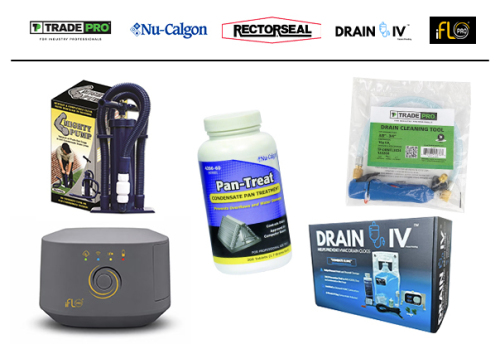
RectorSeal Mighty Pump (97796/97795) When you need to pull the blockage out rather than push it through, the Mighty Pump gives you that option. Compact, easy to use, and effective on stubborn clogs that a CO2 flush alone won’t fully address. A good complement to the CO2 gun when you’re dealing with more established restrictions.

UniWeld Sludge Sucker (40000) For serious buildup — the kind that’s been developing for more than one season — the Sludge Sucker handles what other tools leave behind. If you’re pulling the access panel on a system that clearly hasn’t had drain service in years, this is the tool that gets it done cleanly.

Having all three on the truck means you’re not making a judgment call based on what you happen to have available. You assess what’s there and use the right tool for the situation.

Step Two: Inspect and Replace the Trap

Once the line is clear, take a close look at the trap itself. If there’s visible buildup, discoloration, or any sign of damage, replace it while you’re already there.

TRADEPRO® Clear U Drain Trap Kit with Brush (TP-DTK626) The clear PVC body does two things: it lets you confirm the line is flowing properly before you close up, and it gives the homeowner a visible reference point between service visits. If something starts developing again, they can see it — and so can you on the next call. It’s a small detail that makes the quality of your work visible in a way that opaque fittings don’t.

Step Three: Protect the Pan and Line Going Forward

A clean drain line is only the starting point. What you put in place before you leave determines whether the next tech finds the same problem — or a clean system.

Pan Treatment Tablets and Treatments These are the simplest form of ongoing protection and worth recommending to every customer after a drain service:

  • Pro-Treat Pan Tablets by Diversitech — Slow-dissolving tablets that inhibit algae and biological growth in the condensate pan between service visits. Drop them in, and they work continuously through the season.
  • Pan-Treat by Nu-Calgon — A tablet treatment option for pan and drain maintenance. Effective on algae and mold, and easy to apply as part of a service call.
  • Gel-Tabs by Nu-Calgon — Gel-based treatment that adheres to the pan and releases consistently over time. Good option for customers in high-humidity environments where biological growth is a recurring issue.
  • Pan Pads by Nu-Calgon — Pre-treated pads that sit in the drain pan and provide continuous protection. Low-maintenance and effective for customers who want a set-it-and-forget-it solution between annual service calls.
  • Viper Pan and Drain Treatment — A concentrated treatment for both the pan and drain line. Effective for initial treatment after a cleaning and as part of an ongoing prevention protocol.

The conversation with the homeowner is straightforward: “I’ve cleared the line and replaced the trap. I’m also going to put a treatment tablet in the pan — it slows down the biological growth that caused this in the first place. Between that and the clear trap, we’ve got good visibility on what’s happening in there until I’m back.”

Step Four: Install Automatic Protection

Pan treatments slow the growth. A safety switch handles what happens if something gets past them.

TRADEPRO® Safety Switches A float switch installed in the drain pan shuts the system down automatically if water backs up — before it can overflow into the home. This is the protection layer that catches what pan treatment misses. It’s also a straightforward conversation: the system will protect itself between service visits rather than running until water damage occurs.

For customers who’ve already experienced a backup, or who are in high-humidity environments, this isn’t optional — it’s the responsible recommendation.

Step Five: Consider a Continuous Drain Treatment System

For customers with recurring drain issues, or for anyone who wants the highest level of ongoing protection, a continuous drain treatment system dispenses drain cleaner automatically on a set schedule — keeping the line clear without requiring manual treatment between visits.

DrainIV Kit (390137A) A compact, reliable system that consistently introduces drain treatment into the condensate line. Mounts cleanly, works automatically, and is available in configurations that scale up to commercial applications for contractors working mixed residential and light commercial accounts.

iFlo Kit (378927A) Another strong option for automated drain maintenance. The iFlo system is straightforward to install and gives both you and the homeowner confidence that the line is being maintained continuously — not just when someone thinks to treat it.

These systems are worth discussing with any customer who’s had a drain backup, lives in a high-humidity area, or simply wants the most complete protection available. The install is quick, the conversation is easy, and the customer benefits every month without having to think about it.

What a Complete Drain Service Looks Like

When you put all of this together, a drain line service discovered on a routine call has a clear, professional sequence:

  1. Assess — Pull the panel, check the pan, evaluate the drain line condition
  2. Clear — Use the right tool for the level of restriction (CO2 gun, Mighty Pump, or Sludge Sucker)
  3. Replace — Install a clean clear trap so the work is visible and verifiable
  4. Treat — Add pan treatment to inhibit future biological growth
  5. Protect — Install a safety switch for automatic backup protection
  6. Automate (where appropriate) — Recommend a continuous treatment system for high-risk situations

That’s not a complicated service. It’s a thorough one. And it’s the kind of work that gives a homeowner confidence that whoever is servicing their system is paying attention to the details that matter.

TRADEPRO® drain tools, RectorSeal Mighty Pump, UniWeld Sludge Sucker, Nu-Calgon pan treatments, DrainIV, and iFlo kits are all stocked at your local ECMD branch. Talk to your sales rep about keeping the right combination on your truck — or build your standard drain service kit through Order Templates and have it ready before your next call.


The Coil You Didn’t Clean Last Month Is Costing You Money Today

You diagnosed the problem in twenty minutes. Capacitor looked fine. Refrigerant charge was good. But the system was still underperforming, and the homeowner was already skeptical.

Dirty coils don’t announce themselves. They just quietly choke airflow, reduce heat transfer, and make a healthy system look sick — until eventually it isn’t healthy anymore. By the time the homeowner notices reduced cooling or gets a surprise utility bill, the damage to your reputation is already in progress. Even if it wasn’t your install.

If you’re doing maintenance calls, coil cleaning is already part of your routine. The question isn’t whether to clean — it’s whether you’re using the right product for what you’re actually looking at on that job.


The Hidden Cost of the Wrong Call

Dirty coils force the compressor to work harder to move the same BTUs. A coil with as little as a 10% reduction in airflow can drop system efficiency by 5–10%. On a 3-ton system running through a Southern summer, that’s real money on a homeowner’s power bill — every month.

More importantly for your business: dirty coils are a top driver of callbacks.

Callbacks don’t just cost you the service hour. They cost you the review, the referral, and sometimes the customer. Running 15–20 maintenance calls a month, one avoidable callback a week easily runs $500–$1,000 in lost productive time — before you factor in what it does to your reputation.


Match the Cleaner to the Job

This is the part most techs don’t spend much time on. It’s worth two minutes.

  • Acidic cleaners — Built for heavy condenser work. Breaks down mineral scale and stubborn deposits effectively. Use with care; they’re aggressive and need proper rinsing to avoid fin damage.
  • Alkaline cleaners — The right call for evaporator coils and anywhere grease or oils have built up. Less corrosive, effective on organic soils, easier on coil material.
  • Foaming cleaners — The workhorse of a busy maintenance schedule. Expands into the fins, lifts debris visually, and works safely across most coil types. Good when you’re moving fast.
  • Neutral (non-acidic/non-alkaline) cleaners — Your routine maintenance option. Lighter-duty systems, lightly soiled coils, or occupied spaces where you want minimal fumes. Use this on all aluminum or coated coil applications.
  • Eco-friendly formulas — Worth carrying if you’re working in schools, hospitals, or anywhere with environmental sensitivity. Some regional codes are starting to require them.

Don’t overlook how you’re applying the product, either.

A good cleaner applied poorly is still a partial job. The Nu-Calgon Coil Gun 4774-0 (part# 203283A) is worth adding to your kit. It’s a foaming wand with a quick-disconnect fitting that connects directly to a garden hose. The mixing head automatically blends chemical and water as you spray — no pre-mixing, no measuring, no wasted product. You use less cleaner per job, get better coverage into the fins, and move faster between calls.


A Scenario You’ve Probably Lived

It’s a Tuesday in July. Five maintenance calls on the schedule. Third stop — a unit that’s been running hard all summer, sitting behind a row of overgrown shrubs. The condenser fins are packed.

You’ve got a foaming cleaner on the truck. Nothing heavier. You do what you can, but the coil doesn’t come clean the way it needs to. The system is still moving sluggish air when you leave.

Three weeks later, the homeowner calls. The house isn’t cooling right. Now it’s your problem — even though the refrigerant is good and the install is sound.

That’s not a diagnostic failure. That’s a stocking failure. And it’s completely fixable.


Stock for What You Actually See

Carrying two or three coil cleaner types isn’t a significant investment. It’s the difference between finishing the job and partially finishing it.

The contractors who avoid callbacks on maintenance work treat their truck stock like a tool — not a backup plan. When you have the right product for condenser scale, evaporator grease, and routine maintenance — and the right equipment to apply it — you make the right call without burning time on a supply run.

Shop coil cleaners and the Nu-Calgon Coil Gun at ecmdi.com and order online for same-day pickup at your local branch. Check availability, place your order before you head out, and pick it up on your way to the first call.

One fewer callback pays for a full season of the right supplies. Stock the truck before the next maintenance call.

The Motor Comeback That Kills Your Afternoon

You’re on a service call. Homeowner’s condenser is down, it’s 94 degrees outside, and you’ve got two more calls waiting. You pull the motor, check the tag, and realize you don’t have a match on the truck.

Now you’re making a choice: run to a supplier, wait on a delivery, or reschedule the repair till you can get the motor. None of those options are free. That trip across town is 45 minutes you’re not billing.

This isn’t bad luck. It’s a parts strategy problem.

The Hidden Cost of the Wrong Motor on the Truck

Most service techs think about motor failures in terms of the part itself — did it work, did it fail? But the real cost isn’t the motor. It’s the time gap between diagnosis and completion.

Consider this: if an unplanned parts run costs you 45 minutes, and you average $150/hour in billable labor, that’s $112.50 in lost productivity — per occurrence. Not from bad work. From gaps in your parts inventory.

That’s before you factor in the rescheduling, or the homeowner who decides not to renew their service agreement because the repair took two days instead of one.

The Motor You Grab Should Be the Motor That Works

Here’s what contractors tell us comes up again and again: they don’t mind stocking motors — they just don’t want to stock the wrong ones.

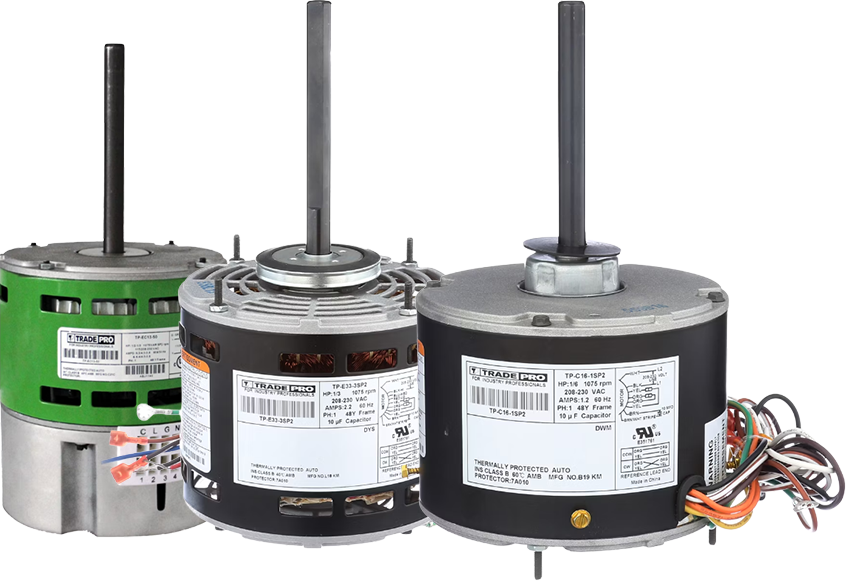
That’s exactly why TRADEPRO® motors are built around wide OEM compatibility. One motor replaces thousands of models across condensers, air handlers, and furnaces. That means fewer SKUs taking up truck space, and a much higher probability that what you grab is what you need.

Every TRADEPRO® motor is also tested twice — once during manufacturing, once after final assembly — covering input power, hi-pot insulation, and continuity. The reason that matters to you isn’t technical. It’s this: you’re not pulling it back out of that unit in 90 days. A 2-year warranty backs that up.

And the 6,000-volt surge protection built into each motor? That’s not a spec sheet bullet point. That’s the difference between a motor that handles a grid fluctuation on a hot August afternoon and one that doesn’t.

Selecting the Right Motor Takes Four Checks — Not Forty Minutes

One reason techs avoid stocking motors is the selection anxiety. Too many variables, too easy to grab the wrong one.

You only need to check four things:

  1. Application — condenser, air handler, or furnace? PSC, X13, or ECM (16pin)? That tells you enclosure type and temp rating.
  1. Horsepower — match the original. If the motor requires a capacitor, replace it with a new one that matches the new motor’s specifications.
  1. Speed — 825 or 1075 RPM? Match this and you protect airflow performance.
  1. Mount type — side shell, belly band, resilient ring, motor studs? TRADEPRO® motors will mount in any of these conditions.

That’s it. Four data points off the original motor tag and you’re done. If you’re ordering through the mobile app, you can pull compatibility right there on your phone before you ever leave the job site.

Stock Smart, Close the Call

The goal isn’t to carry everything. It’s to carry the right things — motors that cover the most common applications, sourced from a line built for reliability and wide replacement range.

TRADEPRO® motors are stocked at your local branch and available same-day. If you’re building out your truck stock and want to know which motor SKUs make sense for your most common call types, your ECMD branch rep can help you put together a short list.

Don’t Skip the IAQ Conversation

You ran 20 service calls last week. At least half of them had air quality issues the homeowner didn’t even know about — musty smells they’d gone nose-blind to, dust buildup on coils that tells a bigger story, humidity levels silently feeding mold behind drywall.

But here’s the question: how many of those calls turned into an IAQ conversation? And of those conversations, how many turned into conversions?

For most contractors, the answer is uncomfortable. Not because they don’t care about air quality — but because they don’t have a simple, repeatable way to bring it up without sounding like they’re upselling.

That’s the real problem. And it’s costing you more than you think.

The Hidden Cost of Skipping the IAQ Conversation

If you run 15–20 service calls per week and only convert 1–2 into an IAQ add-on, you’re leaving significant money on the table. Entry-level IAQ solutions sell for $300–$500 installed. Mid-tier systems run $500–$800. Premium whole-home solutions can clear $1,000+.

Even if you only converted 3 more IAQ add-ons per week at an average of $500, that’s $6,000/month in revenue from work you’re already at the house to do. No additional lead cost. No extra truck roll. No new customer acquisition.

So why doesn’t it happen?

Because most technicians don’t have a framework that makes the conversation feel natural — like a diagnostic recommendation rather than a sales pitch. When you walk in with one product at one price, the customer’s only choice is yes or no. And “no” wins most of the time.

The Reframe: IAQ Isn’t an Upsell — It’s Part of the Diagnosis

Here’s the shift in thinking: you’re not pitching a product. You’re completing the diagnosis.

When you assess a system, you already look at airflow, refrigerant levels, electrical connections, and mechanical wear. Indoor air quality is the piece most contractors skip — not because it doesn’t matter, but because they don’t have a structured way to present it.

The Vive IAQ Good-Better-Best framework gives you that structure. Three tiers. Clear differentiation. A natural way to say: “Based on what I’m seeing in this home, here’s what I’d recommend — and here are your options.”

No pressure. Just a professional completing the picture.

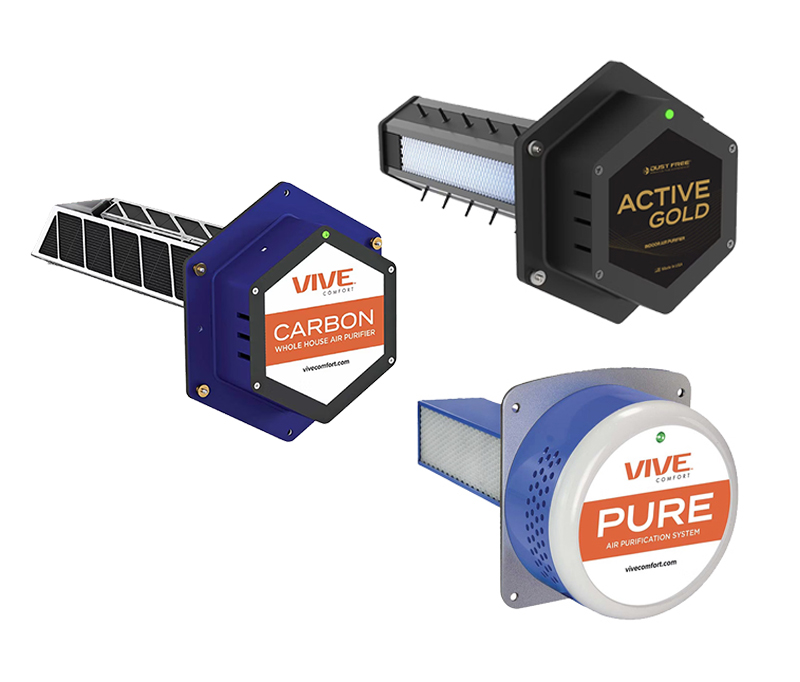
Good: Vive™ Carbon Air Purifier — The Diagnostic Starting Point

When to recommend it: The home smells stale. The homeowner mentions odors. You can see buildup on the coil. They’re budget-conscious but open to improvement.

The Carbon Air Purifier is your entry-level recommendation for homes that need cleaner air without a complicated conversation or installation. It mounts in the duct, uses a proprietary Carbon/UV-C multi-stage technology to target VOCs (including formaldehyde), bacteria on coils, and everyday odors.

Why it works in the field:

  • Compact, duct-mounted — add it to virtually any service call without significant labor
  • UL 2998 tested, zero ozone emissions — recommend with confidence
  • 24V auxiliary power port — if the customer wants to add germicidal UV later, the door is already open
  • No complicated explanation needed: “This targets the odors and compounds that make your air feel stale.”

The conversation: “Based on what I’m seeing on your coil and what you’re describing with odors, I’d recommend at minimum adding an air purifier to your system. This is the most straightforward option — it mounts in your ductwork, targets the VOCs and odors you’re smelling, and requires virtually no maintenance.”

Better: Vive™ Pure Air Purification System — For the Customer Who Asks “What Else Can We Do?”

When to recommend it: Allergy sufferers in the home. Pets. A newer, well-insulated house where reduced air exchange is concentrating pollutants. The homeowner who says “I want better air — not just less odor.”

The Pure Air Purification System steps up to UV purification technology that reduces offensive air pollutants and inactivates bacteria — not just masking symptoms, but addressing broader air quality concerns.

Why it works in the field:

  • Engineered for today’s high-SEER systems — keeps pace with modern, airtight homes
  • Expanded range ballast for increased electrical reliability — fewer callbacks
  • UL 2998 tested, zero ozone
  • Same clean installation profile — 24V aux port, highest-quality construction

The conversation: “You mentioned your daughter’s allergies have been worse since you sealed up the house last year. That tracks — tighter homes trap more of what you’re trying to keep out. The Pure system is designed specifically for newer, efficient homes like yours. It doesn’t just reduce odors — it actively purifies the air moving through your system.”

Why this tier matters: In modern, well-insulated homes, the air exchange rate drops significantly. Homeowners invested in efficiency without realizing they created a sealed environment where pollutants concentrate. This isn’t something most homeowners connect to their HVAC system — but you can.

Best: Vive™ Active Gold Indoor Air Purifier — The Whole-Home Commitment

When to recommend it: High humidity environments. Coastal installs. Homeowners with respiratory conditions, young children, or aging family members. The customer who says “I want the best you’ve got.”

The Active Gold combines three proven IAQ technologies in one unit:

  • Carbon fiber ionizers — actively charge and remove airborne particles
  • Germicidal UV — inactivates biological contaminants at the source
  • Photocatalysts — break down VOCs and odors at a molecular level

This isn’t addressing one category of concern — it’s addressing virtually all of them simultaneously.

Why it works in the field:

  • Corrosion-resistant materials — built for humidity, salt, and temperature extremes
  • UL 2998 + CARB certified — the highest regulatory bar in the industry
  • Twist-lock power cord, gasket-sealed mounting plate — professional install, clean finish
  • 3000V surge protection — reliable in variable electrical environments
  • Made in the USA

The conversation: “Given the humidity levels I’m reading in this home, and what you’ve told me about your wife’s respiratory concerns, I’d recommend going with the Active Gold. It’s three technologies working together — ionization, UV, and photocatalytic oxidation — so it’s not just filtering, it’s actively breaking down contaminants. And the corrosion-resistant build means it’s going to hold up in this climate.”

Quick Reference: Matching the Solution to the Call

Good Better Best
Product Carbon Air Purifier Pure Air Purification System Active Gold
The Trigger Odors, stale air, coil buildup Allergies, pets, tight homes Respiratory concerns, humidity, coastal
What It Targets VOCs, odors, coil bacteria Broader pollutants + bacteria Particles + biologicals + VOCs simultaneously
Ozone-Free ✓ UL 2998 ✓ UL 2998 ✓ UL 2998 + CARB
Aux 24V Port

The Real Insight: You’re Already in the Home

This is the part most contractors miss.

You don’t need a new marketing campaign to sell IAQ. You don’t need new leads. You don’t need a mailer or a Facebook ad. You’re already standing in the home, trusted, with the system open in front of you.

The opportunity isn’t acquiring new customers — it’s completing the service for the ones you already have. Every service call where you don’t assess and address air quality is a call where you left revenue behind and left the homeowner with a problem they didn’t know you could solve.

The Good-Better-Best framework makes it simple:

  • Diagnose the air quality concern (you’re already seeing the signs)
  • Recommend the appropriate tier based on the home and the homeowner
  • Let the customer choose their level — no pressure, just options

You assessed the system. You know the home. Now finish the job. Select your solution now.

Ready to present IAQ options professionally to your homeowner customers? Use SimpleProposal to build a branded proposal from your cart — including IAQ products, labor, and accessories — and share it on-site before you leave.


TRADEPRO® Surge Protection Solutions Protect You Too

The Callback You Didn’t See Coming

You installed a high-efficiency system six months ago. Clean job. Customer was happy. Then you get the call: control board is fried. Compressor acting up. Customer wants to know why.

You already know the answer. You just didn’t see it coming.

Power surges aren’t dramatic. Most of them aren’t lightning strikes. They’re the slow, invisible damage that builds up every time the A/C cycles on, every time the grid hiccups, every time a generator kicks in down the street. The electronics in today’s inverter-driven systems — the variable-speed motors, the communicating control boards, the ECM components — are not forgiving. They weren’t built to absorb that stress. They were built to run clean power. And in most residential installs, that’s not what they’re getting.

Here’s What That Callback Actually CostS You

Let’s run the numbers.

A replacement control board can run $300–$600 in parts alone. Add two hours of labor, a return trip, and the time you spent diagnosing — and you’re looking at $500–$900 out the door, much of it your own time. Then factor in the warranty call you have to make, the paperwork, and the customer who now has a question mark in their head about the system you installed.

Most manufacturer warranties don’t cover surge damage. That’s not fine print — that’s the exposure sitting on every install you complete without protection.

Now compare that to the cost of surge protection at install: $50–$150 depending on the level. That math isn’t close.

Contractors who include surge protection in every proposal aren’t just upselling. They’re protecting their own time, their own reputation, and their own callback rate.

Matching the Right Protection to the Right Job

Not every customer needs the same solution. TradePro’s surge protection lineup gives you a clear, defensible recommendation for every install — from budget-conscious homeowners to premium inverter system buyers.

Good — TP-SPD-50

Baseline protection. Every install deserves this.

The TP-SPD-50 is a Single Phase Type 1 surge protector. It handles what causes most equipment damage day-to-day: voltage spikes from A/C cycling, utility fluctuations, nearby motors, and generators. Compact. Straightforward to install. No reason not to put one on every job.

When a homeowner says they don’t want to spend extra, this is your answer. The cost is low enough that most customers won’t push back — and it closes the loop on the most common cause of premature board failure.

Best for: Any residential install where the customer wants baseline protection at a practical price point.

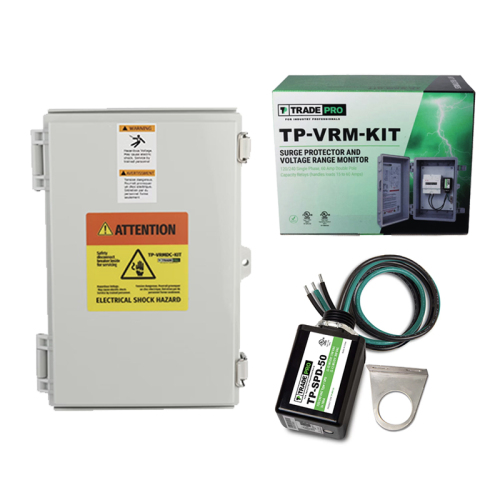
Better — TP-VRM-KIT

When you’re protecting a serious investment.

The TP-VRM-KIT pairs the TP-SPD-50 with a VRM60A voltage range monitor — all in a single NEMA 3R enclosure. The difference between Good and Better isn’t just more protection. It’s a different category of protection.

The voltage monitor watches incoming power continuously. If voltage swings too high or too low — conditions that can destroy a compressor quietly, over time — it automatically disconnects the equipment and resets once conditions normalize. No service call needed. No customer panic.

This is the right recommendation when your customer is in an area with inconsistent utility power, running a higher-end system, or simply wants to know you thought of everything. The all-in-one enclosure keeps the installation clean and professional.

Best for: Higher-efficiency systems, areas with known voltage fluctuation, customers who’ve had equipment problems before.

Best — TP-VRMDC-KIT

Built for the systems your customers are buying today.

Modern inverter-driven equipment — Daikin, Amana, GREE — is engineered for efficiency and communicating control. It’s also engineered with tight electrical tolerances. That’s what makes it perform. It’s also what makes it vulnerable.

The TP-VRMDC-KIT combines the RSH-VRM60A voltage range monitor and RSH-50 surge protector with a built-in 60-amp disconnect breaker, all in a NEMA 3R enclosure. One box. One connection point. Everything a premium install requires — and the disconnect is already there, which means you’re not running a separate step.

When you’re installing a $6,000–$10,000 system and the homeowner has just made a real investment in their home, this is the professional recommendation. It’s also the one that removes all the friction at inspection.

Best for: Inverter-driven systems, premium installs, new construction, any job where the equipment cost justifies complete protection.

Quick Reference

Good TP-SPD-50 Better TP-VRM-KIT Best TP-VRMDC-KIT
Surge Protection
Voltage Monitoring
Auto Disconnect/Reset
Built-In Disconnect Breaker
NEMA 3R Enclosure
Best For Every install Enhanced protection Modern inverter systems


One More Thing Worth Knowing

Surge protectors work best when they’re properly sized and grounded to a single-point ground. This isn’t optional — it’s the difference between a protector that performs and one that just looks like it does. If that’s not part of your standard install process, it should be.

The Professional Reason to Offer This on Every Job

You already know how to do the mechanical work. What surge protection gives you is a way to stand behind the full system — not just the equipment. Customers remember the contractor who thought ahead. They also remember the one who had to come back.

Including surge protection in every proposal means fewer callbacks, a stronger warranty story, and a tangible reason for the homeowner to say yes on the spot. The TP-VRMDC-KIT, in particular, is an easy add to any inverter system proposal because the value is obvious — and because the cost of not including it shows up in the first year of operation.

Ready to stock these? 

TRADEPRO® surge protection is available now through your local branch or directly through your shopping cart. If you’re not already building your proposals with SimpleProposal, this is a good time to start — add surge protection as a standard line item on every system quote and let the math close it for you.

We have the surge protection solutions you need in stock today!


Enhancing Home Safety This October: The Critical Role of Carbon Monoxide Detectors in HVAC Maintenance

Carbon Monoxide Danger sign

October is a great time to remind customers about the importance of carbon monoxide (CO) detectors. As people start using their heating systems more frequently, the risk of carbon monoxide leaks increases, especially in homes with gas furnaces, boilers, or other fuel-burning appliances. HVAC contractors can emphasize the importance of having functional CO detectors installed in key areas of the home and offer to check or install these devices during routine maintenance visits. This not only enhances safety but also builds trust with customers by showing a commitment to their well-being.

Why Carbon Monoxide Detectors are Important:

  • Safety First: Carbon monoxide poisoning can cause symptoms such as headaches, dizziness, nausea, and even death. Having functional CO detectors can provide early warnings and save lives.
  • Legal Requirements: In many areas, building codes and regulations require the installation of CO detectors in homes, especially near sleeping areas.
  • Peace of Mind: Knowing that their home is equipped with CO detectors can give homeowners peace of mind, especially as they start using their heating systems more frequently.

Continue reading “Enhancing Home Safety This October: The Critical Role of Carbon Monoxide Detectors in HVAC Maintenance”

Maximize Engagement and Efficiency: HVAC Contractor Tips for National Energy Awareness Month

Energy awareness month

October is National Energy Awareness Month in the United States, and it’s a prime opportunity for HVAC contractors to engage with clients, promote energy efficiency, and boost their business. Here are some ways HVAC contractors can make the most of Energy Awareness Month:

1. Promote Energy Audits

  • Offer Discounts: Provide special discounts on energy audits during October to encourage more clients to take advantage of this service.
  • Highlight Benefits: Educate clients on how energy audits can identify inefficiencies and lead to significant savings on energy bills.

Continue reading “Maximize Engagement and Efficiency: HVAC Contractor Tips for National Energy Awareness Month”

The Ancient Origins of Geothermal Heating: Harnessing the Earth’s Natural Heat

Ancient Geothermal Heating

The idea of using the Earth’s natural heat to warm spaces is far from a modern concept. Ancient civilizations ingeniously utilized geothermal energy, building structures around hot springs to capture and use this natural heat for various purposes. From Roman baths to Chinese cooking, the history of geothermal heating is a testament to human ingenuity and sustainability.

Roman Baths

The Romans were pioneers in utilizing geothermal energy. They were skilled engineers, constructing aqueducts and channels to transport hot water from geothermal sources, like natural hot springs, to their baths and homes. The famous Roman Baths in Bath, England, serve as a prime example of their advanced engineering and use of geothermal heat.
Continue reading “The Ancient Origins of Geothermal Heating: Harnessing the Earth’s Natural Heat”

When Does Summer Officially End? Understanding the Astronomical and Meteorological Calendars

Waves on a beach

As the warm days of summer begin to wane, you might find yourself wondering when the season officially ends. Interestingly, the answer can vary depending on which calendar you reference: the astronomical calendar or the meteorological calendar. Both methods offer different perspectives on the end of summer and the beginning of autumn. Let’s dive into each one and explore their significance.

Astronomical Calendar: Marking the Equinox

The astronomical calendar is based on the Earth’s position relative to the Sun. According to this method, the end of summer is marked by the autumnal equinox, which typically occurs around September 22 or 23 in the Northern Hemisphere. This event is when the Sun crosses the celestial equator, resulting in day and night being approximately equal in length.
Continue reading “When Does Summer Officially End? Understanding the Astronomical and Meteorological Calendars”

How Hurricane Andrew Transformed HVAC Building Codes

Hurricane Andrew Track

Hurricane Andrew, one of the most powerful and destructive storms in U.S. history, struck South Florida in August 1992. As a Category 5 hurricane, Andrew caused widespread devastation, leading to significant changes in building codes and construction practices. Among the many areas affected, HVAC systems saw notable improvements in resilience and safety standards. Let’s delve into how Hurricane Andrew reshaped the way we think about and secure our HVAC systems.

The Impact of Hurricane Andrew

Before Hurricane Andrew, many HVAC systems in South Florida were not designed to withstand the extreme winds and flying debris associated with such powerful storms. The hurricane’s 175 mph winds ripped air conditioning units from their mounts and severely damaged ductwork, leaving many homes and buildings without functional cooling systems in the sweltering aftermath.
Continue reading “How Hurricane Andrew Transformed HVAC Building Codes”